
The smell of fresh bread is irresistible to me. Growing up, my kitchen was filled with my grandmother’s flatbread-making. These moments are now part of my treasured homemade lavash bread recipe.
This lavash bread recipe is a journey through history. It comes from the Caucasus region, with roots in Armenia, Iran, and Azerbaijan. UNESCO recognized its cultural importance in 2014.
Whether you’re an experienced baker or just starting, this recipe will help you make a delicious flatbread. It’s versatile and satisfying. Get ready to make your kitchen smell like a traditional bakery and impress your family with a bread loved for generations.
Jump to
What is Lavash Bread?
Lavash bread is a treasure from Middle Eastern and Caucasian cuisines. It’s more than a simple flatbread. It’s a symbol of culture that has traveled through time.

It comes from places like Armenia, Iran, and Azerbaijan. UNESCO has recognized Armenian lavash as an Intangible Cultural Heritage. This shows its deep cultural value.
A Culinary Journey Through Time
The authentic lavash bread recipe uses simple ingredients: wheat flour, water, yeast, and salt. It’s versatile, used in many dishes, from wraps to side dishes.
- Traditionally baked in a tonir (underground clay oven)
- Thinner than most flatbreads like pita or naan
- Incredibly versatile for wraps and sandwiches
Cultural Significance Across Regions
Lavash is more than food. In Armenia and Iran, it’s key in celebrations like Nowruz (Persian New Year). Its thin texture is great for many dishes, from street food to fancy meals.
Exploring traditional cooking or looking for a versatile bread, lavash is a tasty peek into rich cultures.
Ingredients You’ll Need for Lavash Bread Recipe
Making perfect lavash bread begins with the right ingredients. Whether you’re an experienced baker or new to the kitchen, knowing the key ingredients is essential. This knowledge will help you make a lavash bread recipe that’s as good as those from traditional bakeries.

To make delicious lavash bread, you need to pick the right ingredients. Let’s look at the essential items for your baking journey.
Essential Ingredients for Your Lavash Bread Recipe
- All-purpose flour (unbleached preferred): 2 cups
- Whole wheat flour: 1 cup
- Dry active yeast: 1 teaspoon
- Sugar: 1/2 teaspoon
- Sea salt: 3/4 to 1 tablespoon
- Olive oil: 4 tablespoons
- Warm water: 700 ml
Optional Add-ins for Extra Flavor
Enhance your lavash bread with these exciting add-ins:
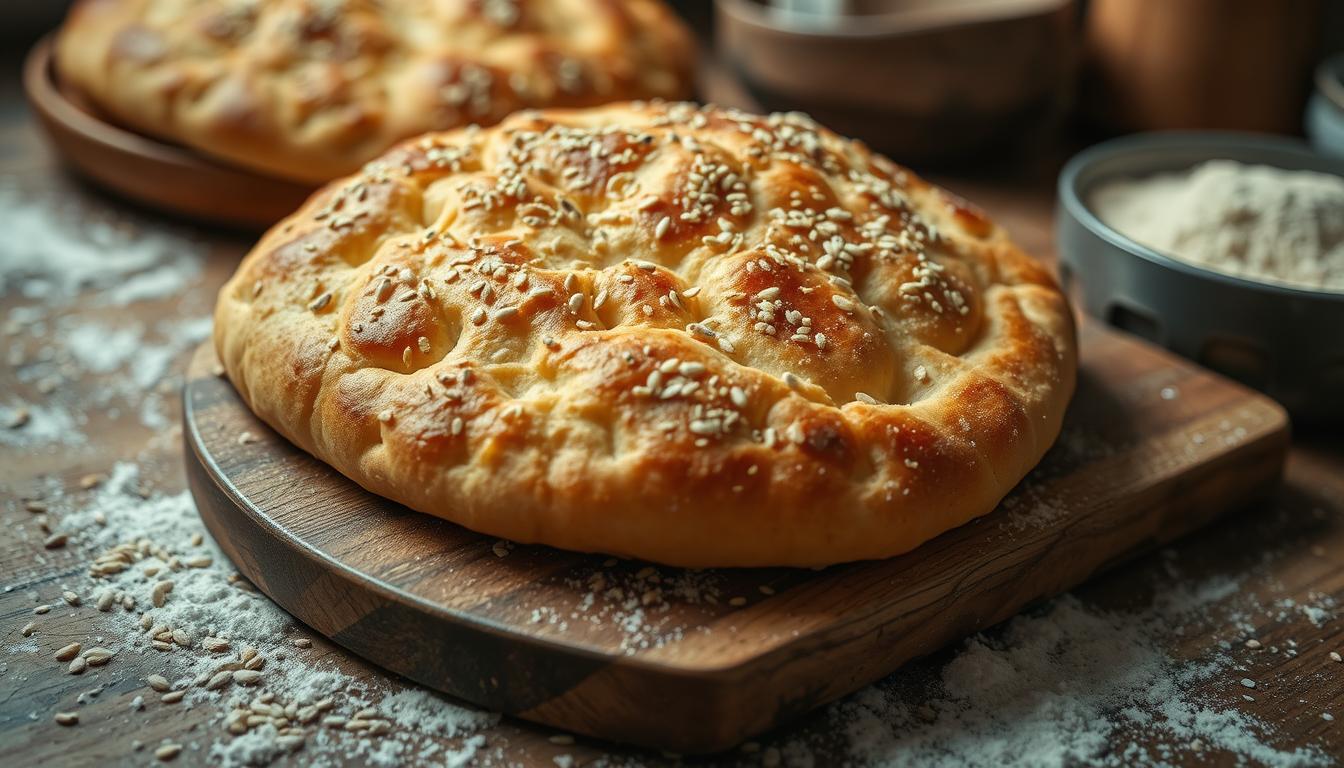
- Sesame seeds for a nutty crunch
- Poppy seeds for visual appeal
- Ajwain seeds for a unique herbal note
- Dried herbs like thyme or oregano
- Crushed garlic for savory depth
| Ingredient Category | Quantity | Purpose |
|---|---|---|
| Flour Base | 3 cups total | Provides structure and texture |
| Leavening Agent | 1 teaspoon yeast | Helps bread rise and develop flavor |
| Liquid | 700 ml water | Binds ingredients and activates yeast |
| Fat | 4 tablespoons olive oil | Adds moisture and richness |
Pro tip: Always use fresh ingredients and measure carefully to ensure the best results in your lavash bread baking experience!
Kitchen Tools Required
To make a tasty lavash bread, you need the right tools. Learning to make lavash bread starts with choosing the right kitchen tools. These tools help you make authentic, delicious flatbreads.
Essential Utensils for Crafting Lavash
When you start your lavash bread recipe, you’ll need some key tools. Here’s a list of the essential utensils:
- Large mixing bowl for preparing dough
- Measuring cups and spoons for precise ingredient quantities
- Sturdy rolling pin for shaping flatbreads
- Kitchen scale for accurate measurements
- Clean work surface for kneading
Baking Surface Considerations
The right baking surface can make your lavash bread even better. Professional bakers suggest several options for that perfect crispy texture:
- Pizza stone: Provides even heat distribution
- Inverted baking sheet for home ovens
- Parchment paper for easy handling
- Traditional tawa or flat griddle for stovetop cooking
Pro tip: When learning to make lavash bread, invest in quality tools. They help you make consistent, delicious results every time.
Step 1: Preparing the Dough
Making homemade lavash bread starts with the dough. It’s all about mixing and kneading the right ingredients. These steps turn simple parts into a tasty flatbread.
Measuring Your Ingredients Precisely
Getting your ingredients right is key for homemade lavash bread. Here’s what you need:
- 2 cups of all-purpose flour
- 1 teaspoon of sugar
- 1 teaspoon of active dry yeast
- 1 cup of lukewarm water
- 5 tablespoons of liquid oil
- 1 teaspoon of salt
Mixing the Perfect Dough
First, mix yeast with warm water and a bit of sugar. Wait 10-15 minutes for it to froth. Then, mix dry ingredients in a bowl, leaving a well for the wet stuff.
| Ingredient | Measurement | Purpose |
|---|---|---|
| Flour | 2 cups | Provides structure |
| Yeast | 1 teaspoon | Helps dough rise |
| Olive Oil | 5 tablespoons | Adds moisture |
Kneading Techniques for Perfect Texture
Knead the dough for 5-7 minutes on a floured surface. Aim for a smooth, elastic dough that bounces back. If it’s too sticky, add a bit of flour. For extra flavor, drizzle olive oil while kneading.
Pro tip: The dough should be slightly tacky but not sticky to your hands. This is the start of your homemade lavash bread journey.
Step 2: Allowing the Dough to Rise
Mastering the rising process is key to making authentic lavash bread. The dough’s rising time is vital for flavor and texture. This makes traditional lavash bread truly special.
When baking lavash bread, understanding dough rising is important. The fermentation process turns simple ingredients into a delightful bread. It’s a magic transformation.
Importance of Rising Time
Proper rising time is critical for your traditional lavash bread recipe. Here’s why it matters:
- Develops complex flavor profiles
- Creates optimal bread texture
- Allows gluten to relax and develop
- Ensures even cooking
Covered vs. Uncovered Rising Techniques
| Rising Method | Pros | Cons |
|---|---|---|
| Covered Rising | Prevents drying | Can trap excess moisture |
| Uncovered Rising | Allows air circulation | Risk of dough surface drying |
Professional bakers suggest resting your lavash dough for about 45-60 minutes. Keep it in a warm, draft-free area for best rising. A gentle cover like a damp kitchen helps keep the right moisture.
Remember, patience is key when making your perfect lavash bread. The rising process turns simple ingredients into a culinary masterpiece.
Step 3: Shaping the Lavash
Making authentic lavash bread needs careful shaping. After the dough rises, you’ll turn it into thin, delicate flatbreads. These flatbreads capture the true spirit of traditional baking.
Traditional Shaping Techniques
To start making lavash bread, divide the dough first. Split it into 10-12 equal parts. Each part should be rolled into a smooth ball for even size and texture.
- Divide dough into 10-12 equal sections
- Shape each section into a smooth round ball
- Flatten each ball using hand techniques
- Stretch dough into thin ovals or circles
Tips for Perfect Thickness
Getting the right thickness is key for authentic lavash bread. Use your hands to stretch the dough gently. Avoid using rolling pins, as they can make the dough too thick.
| Technique | Description |
|---|---|
| Hand Stretching | Gently pull dough to 10-12 inches wide |
| Moisture Trick | Lightly wet dough surface with water or milk |
| Preventing Bubbles | Poke small holes with a fork |
Pro tip: For an authentic texture, aim for thin, translucent dough. Your lavash should be delicate yet strong enough to hold fillings or be used as a wrap.
Step 4: Cooking Methods – Lavash Bread Recipe
Learning how to cook your lavash bread recipe can make a big difference. Different ways to cook it can change its texture, taste, and quality.
Baking in an Oven
The oven method is great for making your lavash bread. Here’s what you need to do:
- Preheat oven to 425°F (218°C)
- Use a pizza stone or inverted baking sheet
- Bake for 10-15 minutes until lightly golden
Stovetop and Grill Techniques
Traditional lavash bread is often cooked on other surfaces. These methods can give your homemade lavash amazing results:
- Stovetop Method:
- Use a preheated cast-iron skillet
- Cook on medium-high heat
- Flip after 30 seconds
- Grill Method:
- Preheat grill to medium-high
- Place lavash directly on grates
- Cook for 1-2 minutes per side
| Cooking Method | Temperature | Cooking Time | Texture Result |
|---|---|---|---|
| Oven | 425°F | 10-15 minutes | Crisp, even browning |
| Stovetop | Medium-High | 30 seconds per side | Soft, slightly charred |
| Grill | Medium-High | 1-2 minutes per side | Smoky, lightly crisp |
Pro tip: Watch your lavash carefully during cooking to prevent burning and achieve the perfect texture.
Step 5: Understanding Cooking Times
Mastering cooking times is key for the best lavash bread. It needs careful attention and precise timing. This ensures the perfect texture and flavor.
Factors Affecting Cooking Time
Several elements affect lavash cooking time:
- Oven temperature (typically 450°F-500°F)
- Thickness of the dough
- Cooking method (oven, stovetop, or grill)
- Specific recipe variations
Signs Your Lavash is Perfectly Cooked
Knowing when your lavash is ready is important. Here are the signs:
| Cooking Method | Typical Cooking Time | Readiness Signs |
|---|---|---|
| Oven | 5-8 minutes | Light golden bubbles, slight charring |
| Stovetop | 2-3 minutes total | Bubbles forming, slight browning |
The key is to watch for subtle changes. Your lavash should be soft and pliable, not hard. Look for light golden bubbles and a slight char for depth in flavor. Each piece should be flexible yet fully cooked.
Pro tip for the best lavash bread recipe: Remove the bread from heat just as it starts to develop those characteristic golden spots. This ensures a tender, delicious flatbread that’s perfect for wrapping, dipping, or enjoying on its own.
Variations of Lavash Bread
Exploring different lavash bread recipes can make baking fun. An authentic lavash bread recipe has many tasty variations. These can meet various tastes and dietary needs.
Making unique lavash bread is easy. You can add exciting flavors and ingredients to this versatile flatbread.
Flavored Lavash Ideas
Try these creative flavor additions to your lavash bread recipe:
- Sprinkle sesame seeds for nutty crunch
- Add poppy seeds for subtle texture
- Incorporate dried herbs like rosemary or thyme
- Experiment with spices such as za’atar or sumac
Gluten-Free Lavash Alternatives
For those with gluten sensitivities, making a gluten-free lavash bread is possible. Here are some alternative flour options:
- Almond flour blend
- Chickpea flour
- Rice flour mixture
- Coconut flour combination
When making gluten-free versions, adjust the liquid to get the right dough consistency.
| Variation Type | Key Ingredients | Flavor Profile |
|---|---|---|
| Herb-Infused | Fresh herbs, olive oil | Aromatic, fresh |
| Seeded | Sesame, poppy seeds | Crunchy, nutty |
| Whole Wheat | Whole wheat flour | Hearty, nutritious |
| Gluten-Free | Alternative flour blend | Light, adaptable |
Remember, an authentic lavash bread recipe can be tailored to your dietary needs. It keeps its traditional essence.
Storing and Freezing Lavash Bread
Keeping your homemade lavash bread fresh is key. You can enjoy it for longer by using the right storage methods. This way, your bread stays soft and ready to eat.
Best Practices for Storage
There are a few ways to keep your lavash fresh:
- Room temperature storage for up to 5 days
- Refrigeration for extended freshness up to 2 weeks
- Use an airtight container to prevent moisture loss
- Wrap loosely in a clean kitchen towel
How to Freeze and Thaw
Freezing is a great way to keep your lavash bread longer. Here’s how to freeze and thaw it:
| Freezing Method | Details |
|---|---|
| Preparation | Separate sheets with parchment paper |
| Storage Container | Freezer-safe ziplock bag or airtight container |
| Freezing Duration | Up to 6 months |
| Thawing Process | Room temperature thawing, then light reheating |
To get your lavash bread back to its original state, spritz it with water. Then, warm it up briefly in a pan or toaster oven. Pro tip: Handle your bread gently to keep it soft and prevent cracks.
Serving Suggestions – Lavash Bread
Your traditional lavash bread recipe opens up a world of culinary possibilities. This versatile bread is more than just a simple side dish. It’s a canvas for creativity in your kitchen. From classic pairings to innovative uses, lavash bread can transform your meals with its delicate texture and adaptable nature.
Traditional Pairings
Authentic lavash bread recipe traditions offer rich serving recommendations. In Mediterranean and Middle Eastern cuisines, you’ll find lavash perfectly complementing:
- Grilled kebabs
- Fresh herb platters (Sabzi Khordan)
- Mezze spreads with hummus and baba ganoush
- Scooping up hearty stews and curries
Creative Culinary Uses
Your lavash bread can be transformed into exciting dishes beyond traditional serving methods. Consider these innovative applications:
- Homemade pizza base
- Wrap for Mediterranean-style sandwiches
- Crispy chips with olive oil and spices
- Substitute for tortillas in various recipes
| Serving Style | Recommended Pairings |
|---|---|
| Appetizer | Olive oil, za’atar, fresh herbs |
| Main Course | Kebabs, grilled meats, vegetable stews |
| Snack | Dips, cheese spreads, seed toppings |
Experiment with your lavash bread to discover unique flavor combinations that suit your taste preferences. The possibilities are truly endless!
Common Mistakes to Avoid
Learning to make lavash bread can be tricky. Even skilled bakers face issues when making this traditional flatbread.
Overworking the Dough: A Critical Error
One big mistake in making easy lavash bread is kneading too much. This can make your lavash tough and chewy instead of light and tender.
- Knead only until the dough becomes smooth and elastic
- Stop mixing when the dough no longer sticks to your hands
- Avoid aggressive stretching or pounding
The Importance of Rising Times
Rushing the rising time can ruin your lavash’s texture and taste. Good fermentation makes the bread soft and pliable.
| Mistake | Consequence | Solution |
|---|---|---|
| Skipping Rising Time | Dense, Flat Bread | Allow 1-2 hours for proper fermentation |
| Overworking Dough | Tough Texture | Minimal kneading |
| Incorrect Temperature | Uneven Cooking | Use consistent heat around 450°F |
Knowing these key points will help you make delicious, authentic lavash bread. It will truly capture the traditional essence of this beloved flatbread.
Conclusion and Final Thoughts – Lavash Bread Recipe
Making the best lavash bread recipe at home is more than cooking. It’s a journey that connects you to ancient traditions. You see how simple ingredients can become something amazing.
The global flatbread market was worth $41.17 billion in 2019. This shows how much people love these breads worldwide. Learning to make lavash is about enjoying the process, not just making it perfect. Each time you make it, you get better at it.
Feel free to try new flours or methods in your kitchen. Lavash is like a blank canvas for you to explore. You can serve it with a delicious dessert or use it as a wrap. Your homemade lavash will always be unique. The best recipes come from passion, practice, and a love for learning.
Your lavash bread journey is just starting. Enjoy every step, from mixing to kneading. Share this wonderful bread with your loved ones.
FAQ
What is lavash bread?
Lavash is a thin flatbread from the Caucasus region. It’s loved in places like Armenia, Azerbaijan, and Iran. Made with flour, water, yeast, and salt, it’s soft and flexible. You can use it in many dishes or enjoy it alone.
How long does it take to make lavash bread?
Making lavash takes about 2-3 hours. This includes 1-2 hours for the dough to rise. You’ll also spend 15-20 minutes mixing and 10-15 minutes cooking. The actual time you spend working is about 30-45 minutes.
Can I make lavash bread without a special oven?
Yes, you can make it without a special oven. Use your home oven, stovetop, or even a grill. While tandoor ovens are traditional, home cooks can get great results with a pizza stone or hot skillet.
Is lavash bread healthy?
Lavash can be a healthy choice, even more so with whole wheat flour. It has fewer calories than thick breads and is rich in complex carbs. Adding seeds or using whole grain flour can make it even healthier.
How long can I store homemade lavash bread?
You can keep fresh lavash at room temperature for 2-3 days. Wrap it in a towel or paper bag. For longer storage, freeze it for up to a month. Use parchment paper between sheets and store in an airtight container.
Can I make gluten-free lavash bread?
Yes, you can make gluten-free lavash. Use gluten-free flour blends and adjust the liquid. You might need xanthan gum for the right texture. Try different flours to find the best one.
What are some traditional ways to serve lavash bread?
Traditionally, serve lavash with kebabs, in wraps, or as a base for dishes. In Iran, it’s with Sabzi Khordan (herbs, feta, walnuts, and radishes). It’s also great for dipping in hummus or making sandwiches.